Customizing Payer Notifications
Published 8/8/24
Have you ever wondered if you could adapt the copy in the system-generated payer notifications to better reflect your organization’s voice? You can! And, it’s easy. Head to the Biller Portal to access the Email Notifications menu. Once you’re logged into the Biller Portal:
- click the Gear icon
- select Email Management
- select Email Management again
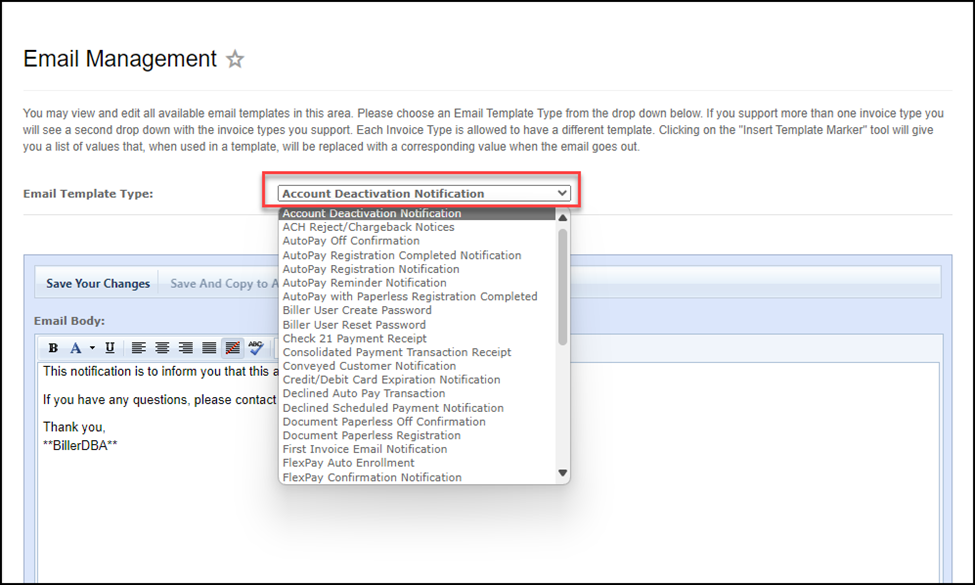
Now that you have accessed the Email Management page, select the template you would like to customize from the Email Template dropdown list – there are 39 that can be customized with your own wording.
Once you have selected the template to customize, you are ready to get started.
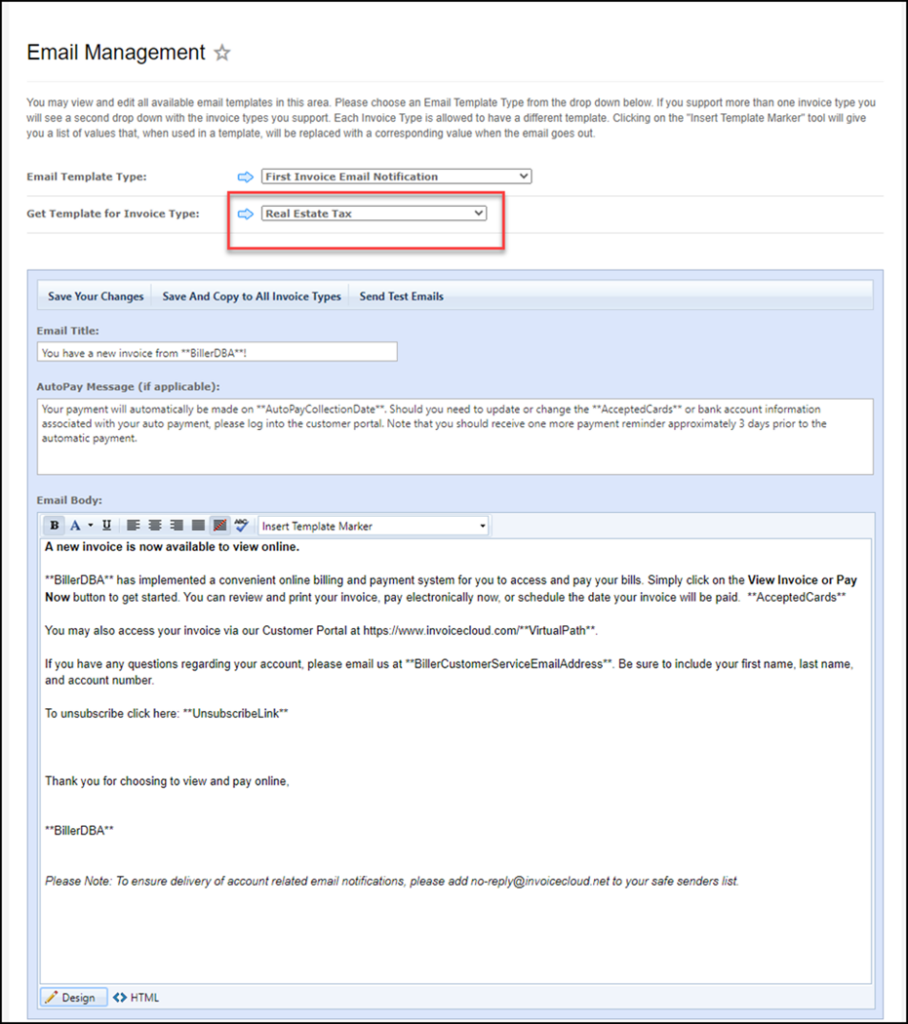
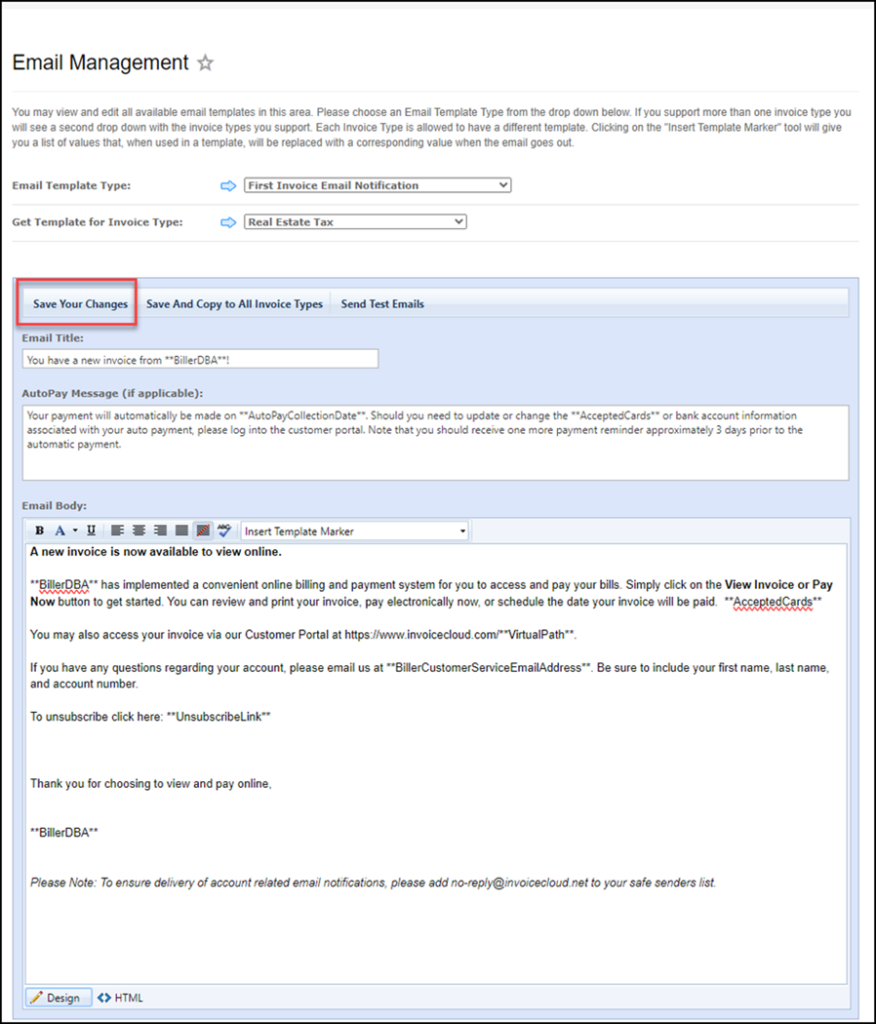
Depending on the template you have selected, you may need to select an Invoice Type. The example here is the First Invoice Email Notification template.
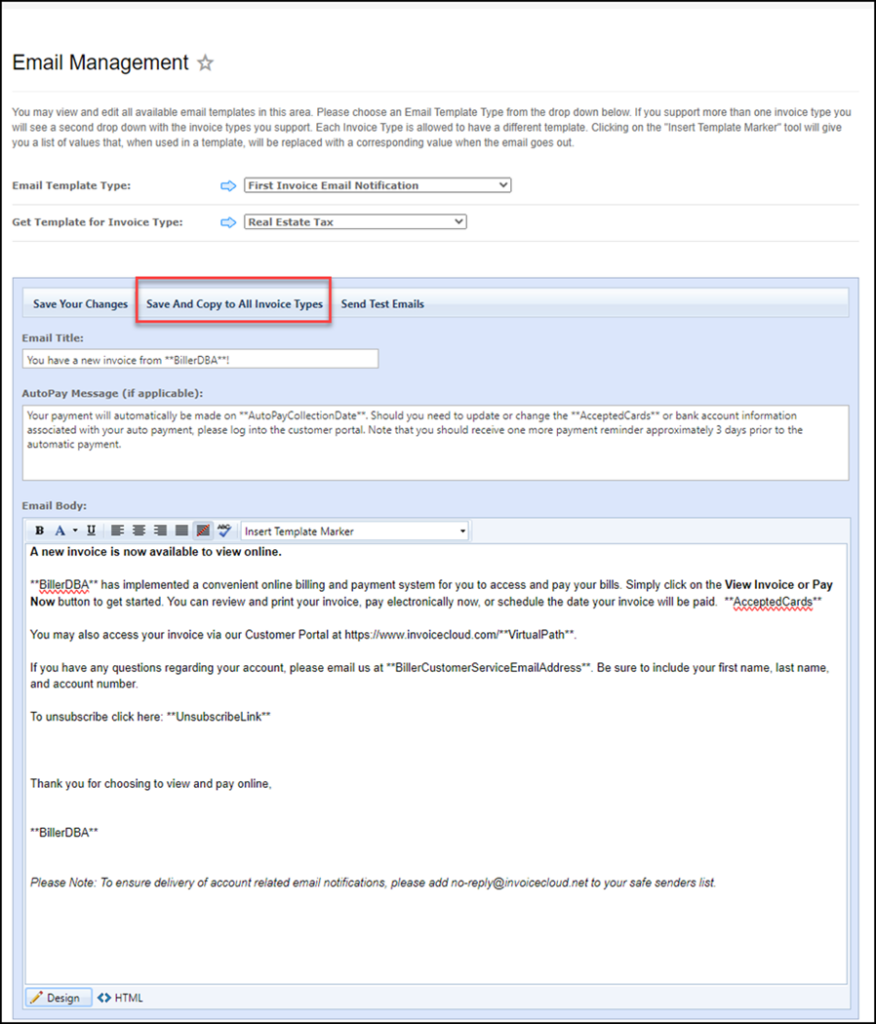
It’s important to note that you don’t have to make the same changes to each Invoice Type. You can make the changes one time, and then Save and Copy to All Invoice Types – or you can make different changes to different invoice types.
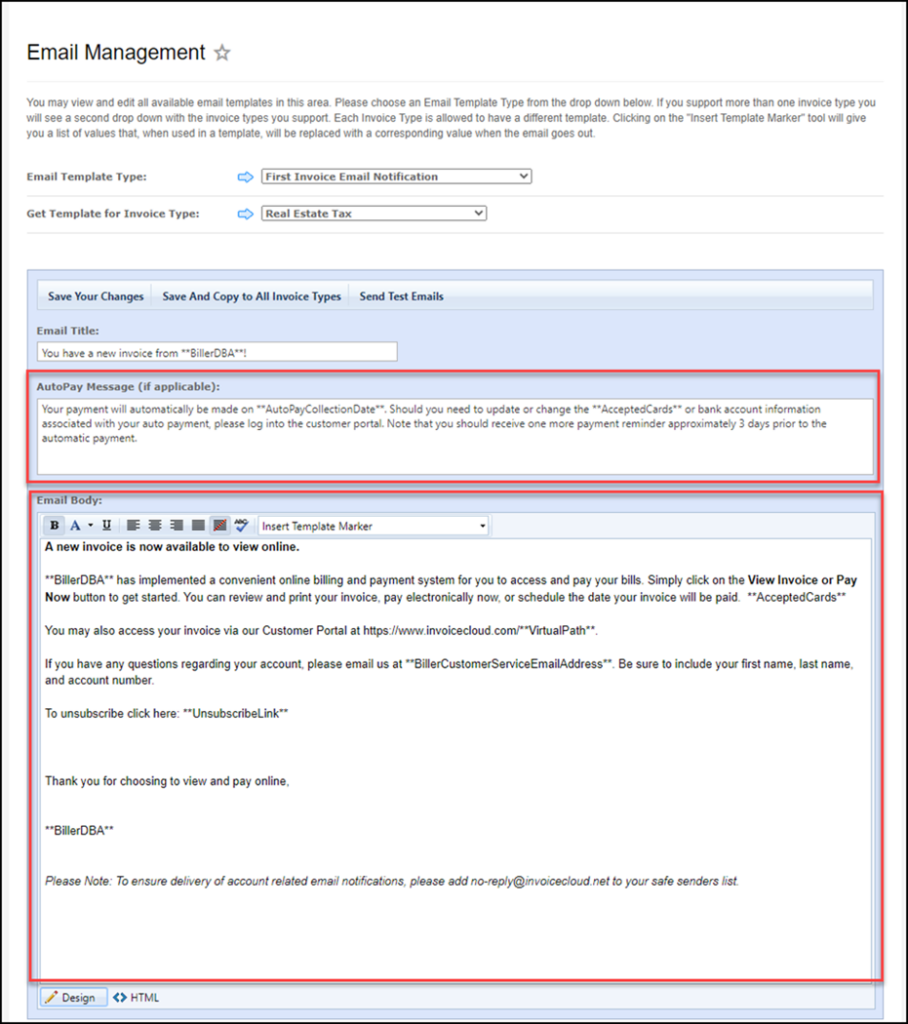
Each email template is configured differently. You’ll notice in our example of First Invoice Email Notification that there are two distinct message areas. The first is for those payers who have enrolled in AutoPay. The other area is for those payers who have not enrolled in AutoPay.
You can change or modify the body of the email message. However, make sure you do not change anything within the double asterisks (**VirtualPath**), as this information is hardcoded, is specific to your organization.
You can also highlight text in bold, change your text color, and underline text you want to ensure your payers pay specific attention to. Additionally, you can justify the text on the page to the left, the right, or the center, and use the embedded spell-check feature.
Lastly, you can select predetermined markers from the Insert Template Marker dropdown list. These markers will insert items specific to your organization, such as your Customer Service Email Address or Phone Number, the credit cards your organization accepts online, and payer-specific information.
You can add new text to any Email Notification – customizing each one to suit the needs of your organization and your payers.
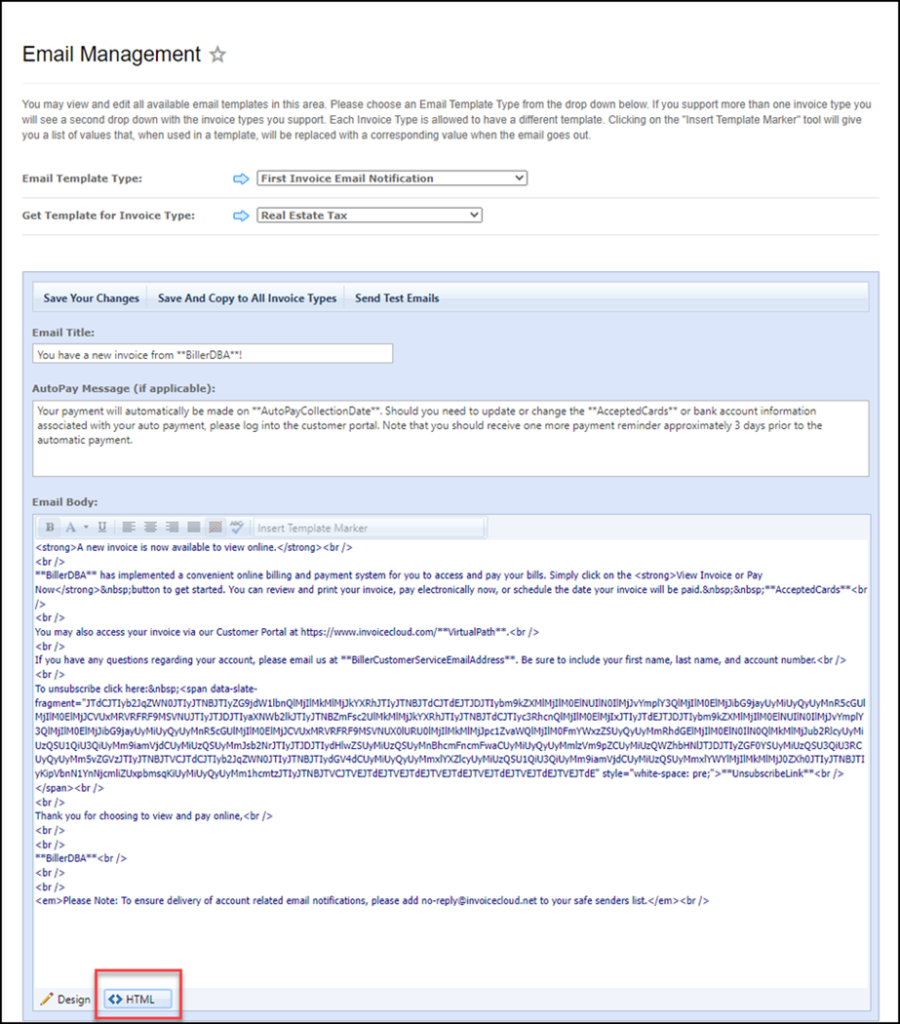
If you would prefer to work in HTML, you can do so by scrolling to the bottom of the page and selecting <HTML>. But remember, don’t change anything in between the double asterisks (**Virtual Path**).
Once you have successfully modified the template, click the Save Your Changes button.
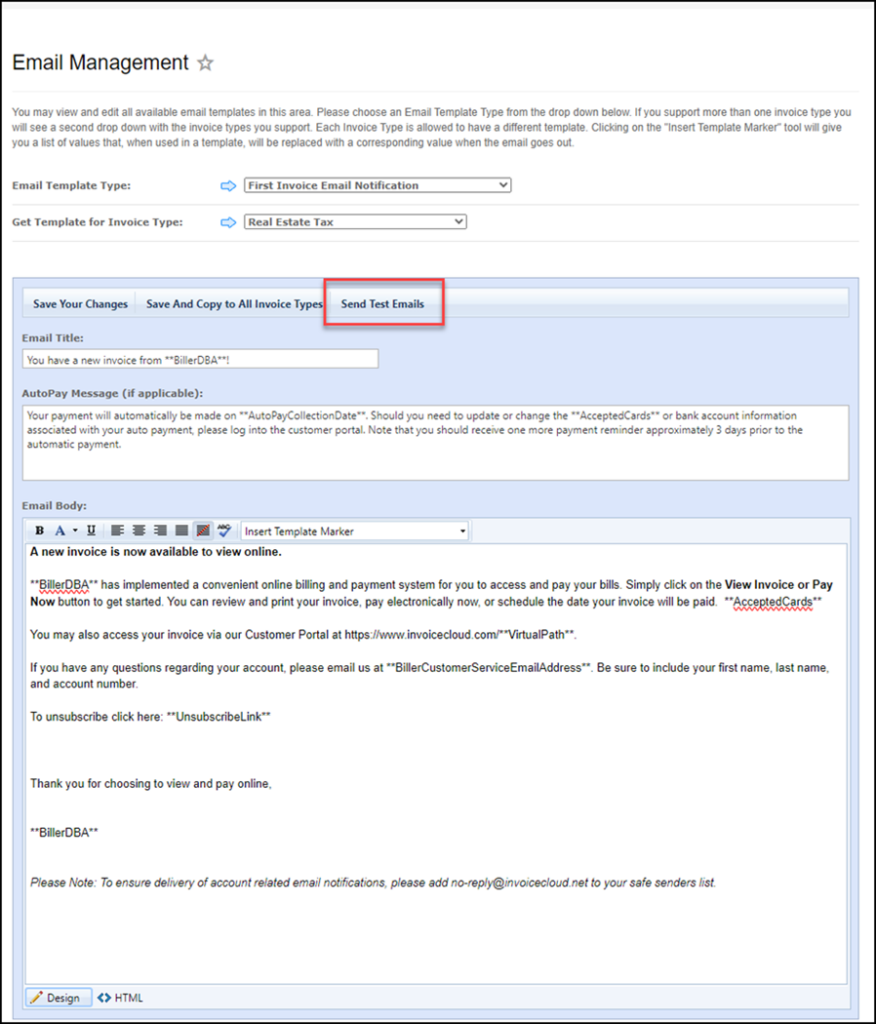
We recommend sending a test email to yourself and maybe others at your organization as a best practice. It’s always a good idea to have more than just one person review the changes you have made. Click Send Test Emails.
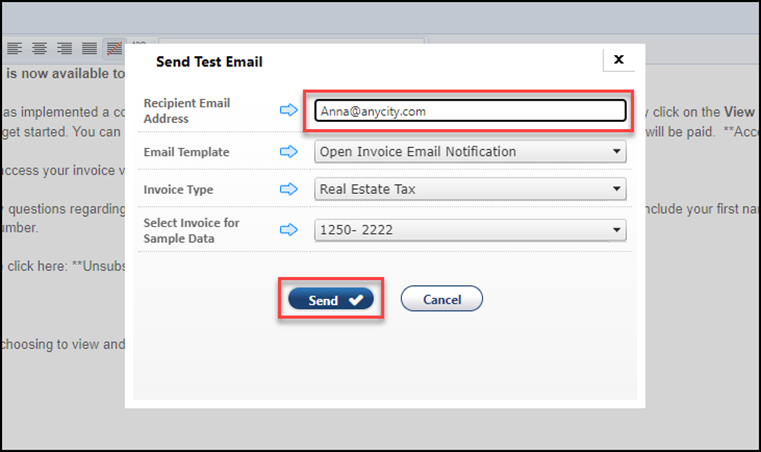
Enter the Recipient Email Address and click Send.
Once you have gathered and implemented any feedback, remember to click Save Your Changes, and if you would like these changes to apply to all your invoices, click Save And Copy to All Invoice Types.
Customizing your Email Templates is easy to do and provides your payers with the information and instructions that you want to make sure they have.
For more information, watch this short video on how to customize your payer notifications.


