In case you haven’t seen it yet, there’s a new Custom Reporting section in the biller portal that gives users the ability to:
- Retrieve more data in reports (without contacting Client Services)
- Schedule reports for future delivery
- Sign up for standard reports
- Utilize a platform on which to build custom reports
Look for the new Custom Reporting menu group in the biller portal, above Portal Customization. This menu group contains one item today, Scheduled Reports. Users can manage the reports they have signed up for in this area.
Scheduling Reports
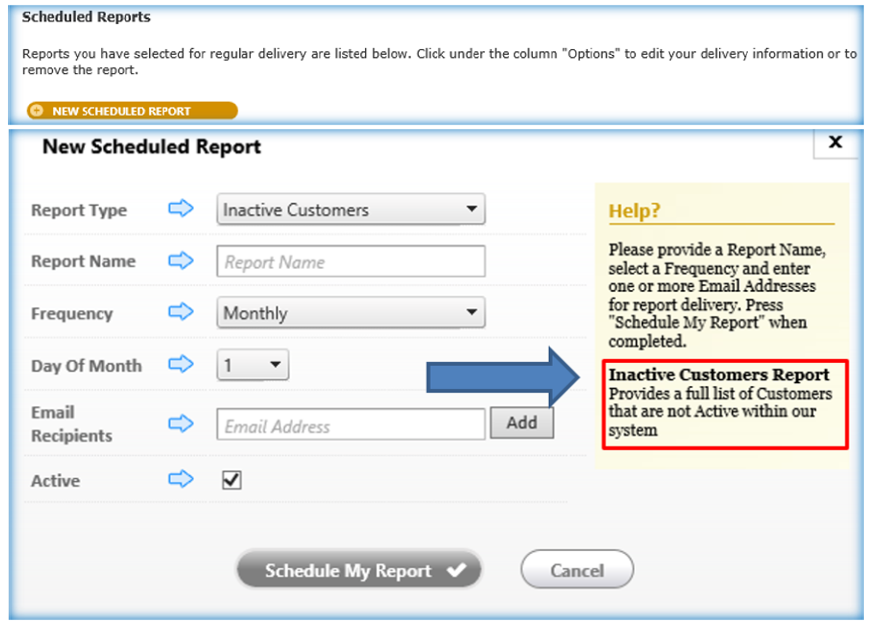
The first method to schedule reports is to click on New Scheduled Report and then sign up for a Standard Report. Standard Reports are reports which were frequently requested by clients that are now available for all users. The following fields are listed for selection on this screen:
- Report Type – Choose from Active Customers, Inactive Customers, Outstanding Invoices and Paperless Customers with Address.
- Report Name – The report name/label, specified by the user.
- Frequency – Daily, Weekly and Monthly frequencies are supported. Standard Reports will have varying available frequencies.
- Email Recipients – Enter the email addresses of who should receive the report.
- Active – Used to enable or disable a report. It is Active by default.
Note: For Standard Reports, there will be a small description of the report in the Help Section
.
The second method to schedule a report is in the following eight areas of the biller portal:
- Search Customers*
- Search Payments*
- Registration Report*
- EFT/ACH Rejects*
- Auto Pay Report*
- Paperless Report*
- View Scheduled Payments *
- Settled Batch History*
These pre-selected reports were modified to support the following functionality:
- Each report has a new output options filter.
- The filter displays a small grid summarizing the output options.
- The first option is checked by default, and the option will have the same functionality as before. Click Submit and you get your records on a grid.
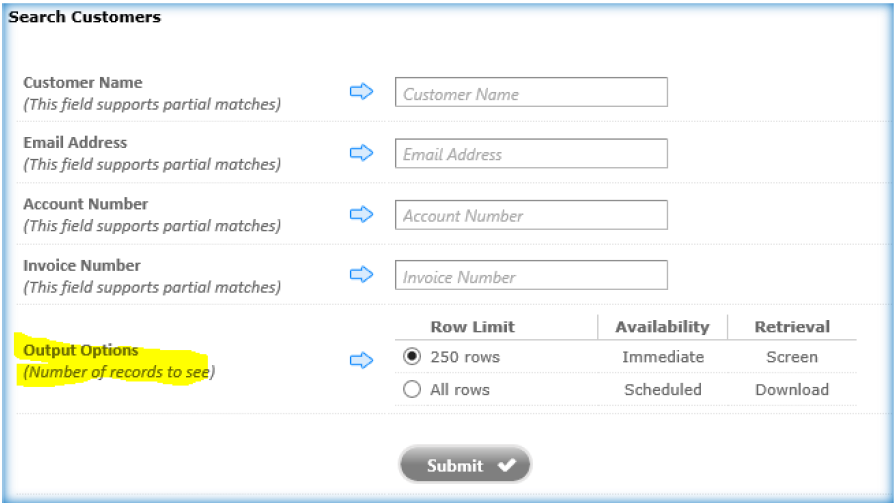
Selecting the All rows option, before clicking Submit, will display the following New Scheduled Report screen. The user can schedule a report that would normally show up in the grid. The difference will be that the user will receive all rows of data instead of a limited set of results. Simply give the report a name, select the frequency and enter your email address.
Daily Frequency – Recipient(s) will receive a report every day, beginning the next day after the report is created.
Weekly Frequency – Recipient(s) will receive a report every week on the Day of the Week that is selected.
Monthly Frequency – Recipient(s) will receive a report every month on the selected Day of the Month. If a day is selected that doesn’t exist for a current month, the day will default to the last day of that month.
As Soon As Possible Frequency – Recipient(s) will receive a report as soon as it is ready. The time required to generate the report will vary based on several factors – mainly what is in queue at the time and the overall system load. Note that there is no Active checkbox with this frequency. This is a one-time request and will not be scheduled for regular delivery.
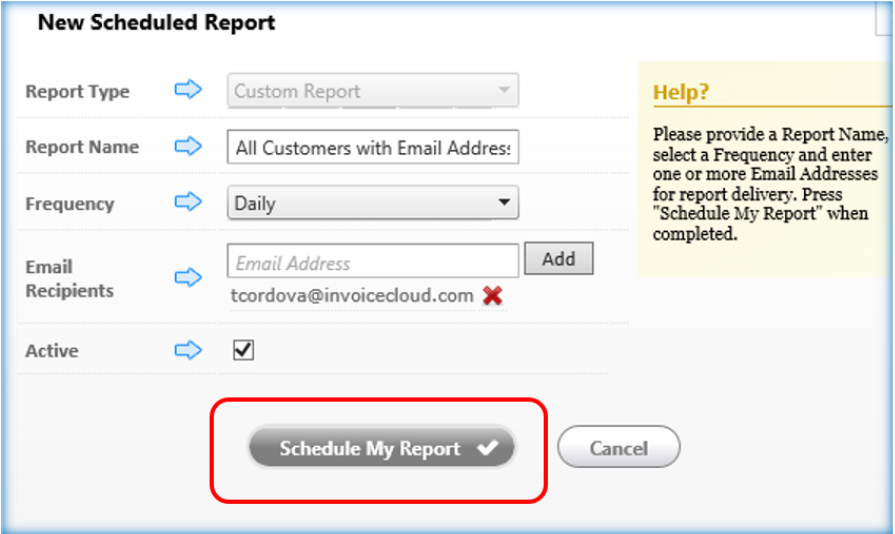
Once all the fields are completed, clicking on Schedule My Report will schedule the report, before returning the user to the prior screen.
The user will see their scheduled report on the Scheduled Reports screen. The status column will provide a quick summary of the next scheduled date. If the report has been previously sent, it will also provide a download link to retrieve the last report on demand. The edit and delete options displayed on this screen are standard options for other areas within the biller portal.
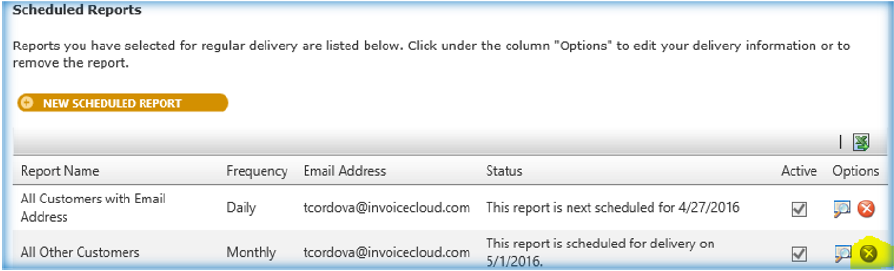
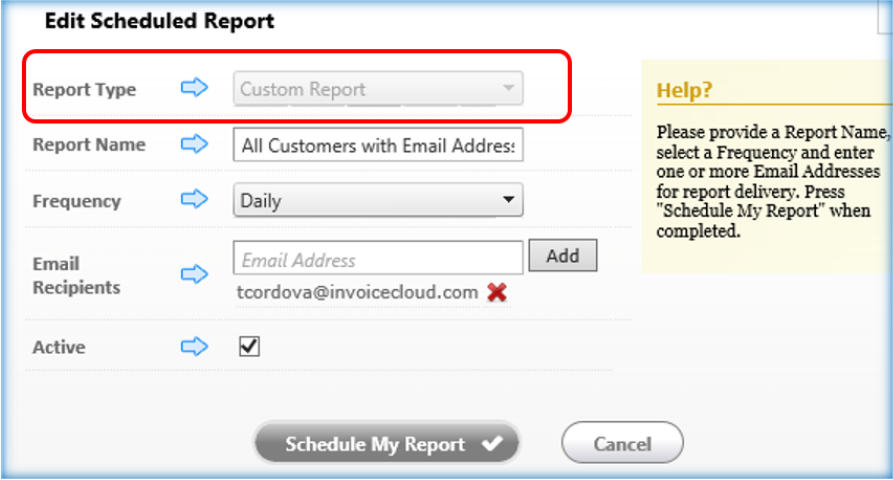
The Edit option will display the scheduled reports screen in edit mode. The Report Type filter cannot be edited, but all other fields are available. The user must schedule a new report if the Report Type field needs to be changed.
Any request to delete a schedule report will trigger a confirmation dialog box to confirm that the report should be deleted. Note that other custom reports created for a specific purpose by InvoiceCloud will not include the delete option. A HelpDesk ticket must be submitted with a request to remove such reports.
Report Delivery
As soon as possible reports will be delivered as soon as possible. Reports on a regular schedule will be delivered early in the morning, starting at 2:00 AM. Depending on how many reports are in queue for the day, delivery may only take minutes, but could extend to hours.
Once a report has been generated, InvoiceCloud will send the recipient an email with a link to download. The subject will come in as InvoiceCloud Report-<Report Name> (<Frequency>). If the report was requested As soon as possible, the frequency will be omitted in the title.
![]()
After a report is sent, the status will reflect the date, as well as a link to download the report again.

Further questions on custom reporting can be directed to Client Services by submitting a HelpDesk ticket or by calling 901-737-8686.